
I am so excited to share this tutorial! I had the pleasure to work with the beautiful Arizona fabric line by April Rhodes. It features an Aztec feel with bold and colorful prints. The prints in this designer line coordinate perfectly with the earthy,desert feel that is so popular in home decor right now.
It all started last summer when my dear friend came to me with a proposition. She had found this amazing fabric that was perfect for her daughter's "big girl" toddler room. She decided on an arrow design for the quilt top and chose 7 of her favorite fabrics to incorporate from the line. With a little procrastination, and then a little planning I dove right in. First of all, I want to stress the fact that I am self-taught and not a professional by any means. I read a ton of sewing blogs and have learned some helpful tips along the way. So without further adieu, here is what I came up with! I will make this short and sweet, sharing helpful tips along the way.

Tip #1 - Start with a plan.
It's important to do the math when you are planning a big project. This is the biggest quilt that I have attempted. Usually I stay in the crib-sized safe zone. It was good for me to step out of my comfort area and tackle something a little bigger. For this project I knew that I would be making a twin size quilt with various fabrics, so figuring out how much to order of each was important.
 |
| I usually draw a scale version of what the quilt top will look like. It's also helpful to map out fabric arrangements and measurements. |
Tip #2 - When working with triangles...SQUARE UP!
This is probably THE MOST important thing to do if you want nice, crisp corners. Overall, this quilt included 35 print arrows made up of 4, 7" blocks. Within each arrow, there were two triangle blocks that needed squaring up. That's a total of 70 small blocks to square up...A LOT! BUT...if you do it, you will thank yourself later. I used a simple 10" quilters square and lined up the 45 degree angle with the line of the triangle to rotary cut off the excess, then I flipped them around, and did the same to the opposite sides. I was left with 70 perfect 7" squares that matched up perfectly with my solid and white 7" squares.
 |
| This picture shows the triangle blocks before they had been squared up...see how there is excess when it is matched with the solid 7" perfect block? |
 |
| Look how nice and pretty they are after they have all been squared up to a perfect 7" I love it! |
 |
| Here are all 4 of the 7" squares sewn together to form the first of 35 quilt blocks. This quilt required 5 arrows from each of the 7 different fabrics. |
Tip #3 - Get yourself a good iron!
Okay, so this is probably the best thing that happened to me during this project. I went out and got myself a brand new iron with an automatic shut off function. I'm not even sure if it is actually a real "quilters" iron, but I don't care...I love it! It makes all the difference when you are ironing small sections at a time. It saved me from having to remember to unplug, then re-plug, then wait for it to heat up, then unplug again, over and over...you get the idea. It's a small thing, but it made such a huge deal in my procrastination mentality. GO GET A GOOD IRON!
 |
| And they all stared in admiration and said "Ahhhh...." Here she is in all her glory! |
Tip #4 - Color your scale drawing of your quilt to help decide fabric placement.
I am a visual person. In order for me to decide on anything, I need to see it first. I always like to break out my daughter's colored pencils and assign each print to a specific color on my scaled drawing. This process helped me to visualize what it would look like and it also helped to not have the same fabric prints too close together. I recommend laying out the final blocks into the arrangement and taking a picture with your phone to refer back to. This also serves as a morality boost because it's the first time that you get to see your quilt top all put together!
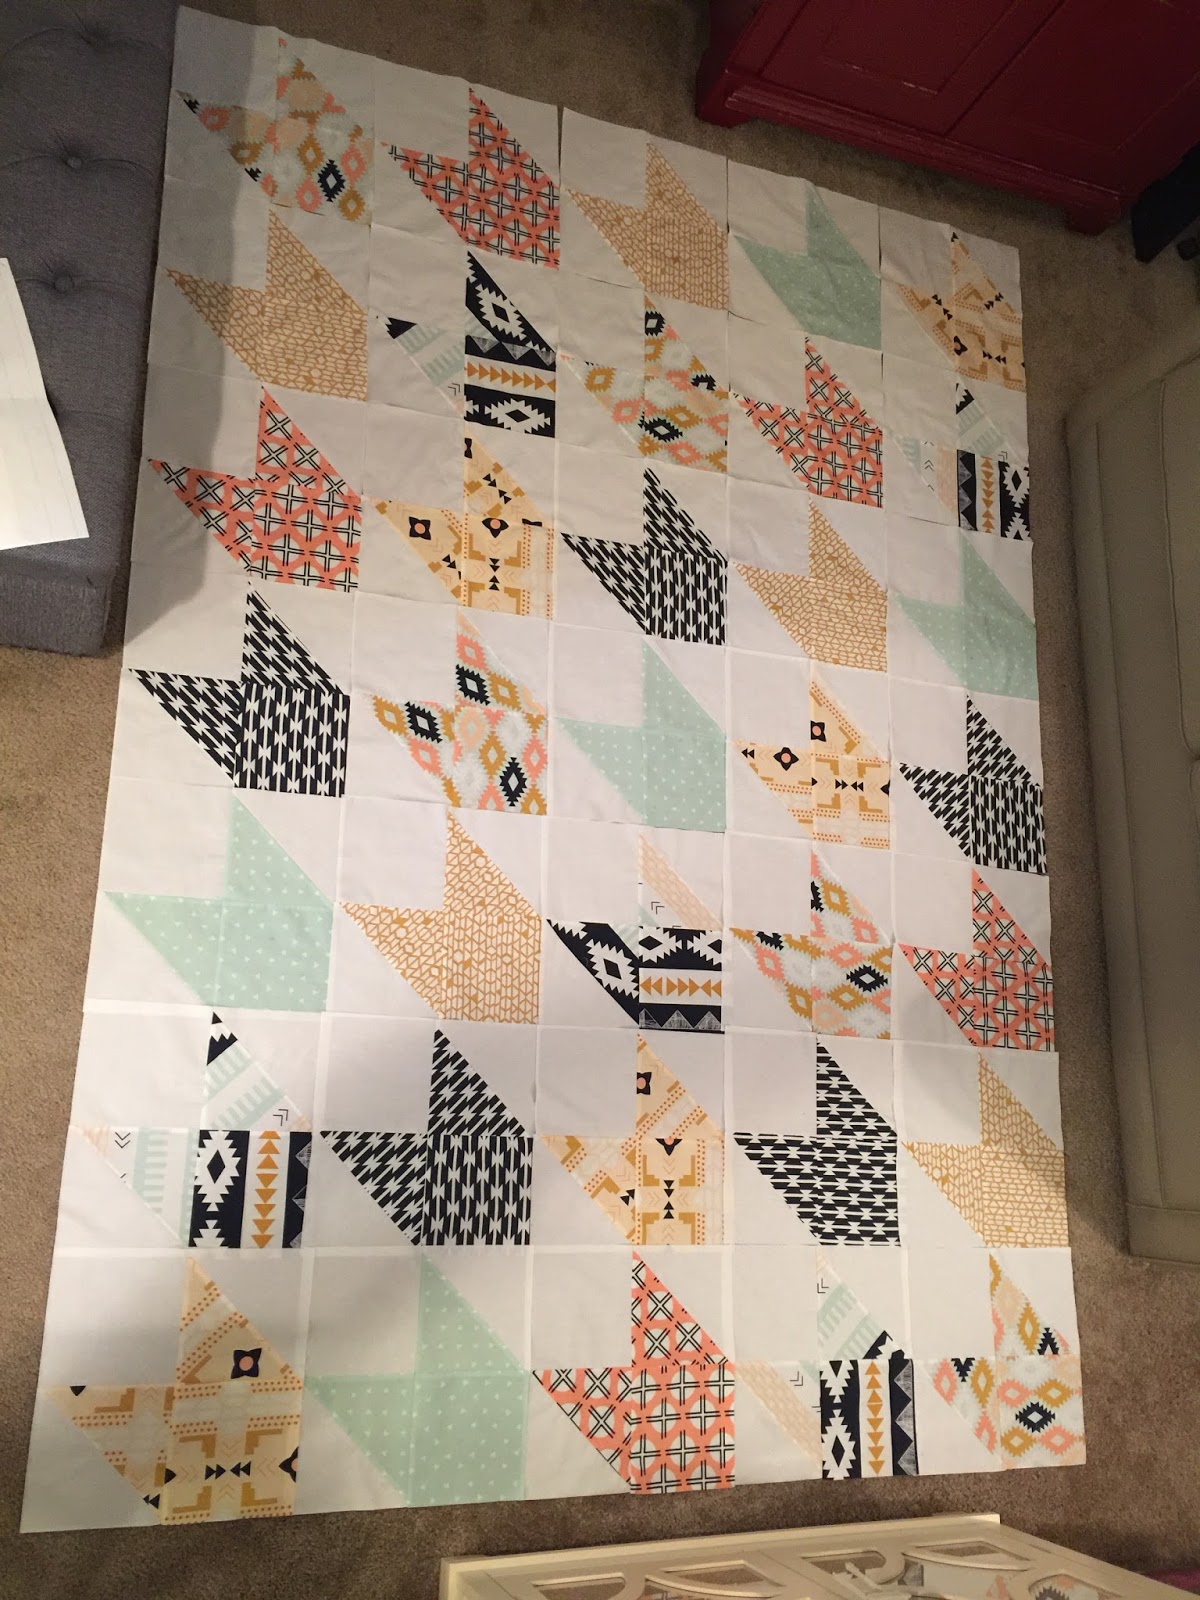 |
| Here are all the blocks laid out in the arrangement I colored on my scaled drawing. |
Tip #5 - Use spray adhesive to baste your quilt.
Like I said before, this was the first time that I quilted a quilt this large. I searched and searched Pinterest for tips and tricks on the best way to baste all three layers together. I used this tutorial as a guide line and also watched this and this. Basting this way was glorious and made me wonder why I had even bothered with the pins in the past. You need a good open space in order to do this, and I recommend being kid-free when it goes down. Lylah was at preschool when I busted out this step and it worked perfectly!
Tip #6 - Use extra tables to help support your quilt while quilting.
I used two fold-able tables, plus my dining room table with extensions to help support the weight of the quilt while I was quilting. It helps to eliminate pulling and puckering while you are feeding the quilt through the machine. I quilted 1/4 inch from the seams in strait lines, so it went pretty fast. But having the tables there for support was a huge bonus!
 |
| A table behind me supported the quilt and kept it strait. This prevented the weight of the blanket from resting in my lap. |
Tip #7 - Machine bind the thing.
Oh my gosh you guys, I can't tell you the anxiety this thing gave me when I thought about hand finishing off the binding! So I used this tutorial and it was pretty much the best thing ever. It went so fast! I extended my binding to 3 inch strips so that I would have more wiggle room when finishing off the final edge. It worked great!
Tip #8 - Use up your scraps!
If you're anything like me, you always save your fabric scraps from projects with the high hopes of someday digging them back out to create something glorious and colorful...a scrappy quilt, or an intriguing wall hanging...well DON'T! If you don't use them now, they will just waste away in a small basket in the back of your fabric closet. This fabric is too beautiful to be wasted...so I created a simple quilted sham to go along with the quilt. It was made up of a few test triangles, along with some squares that were cut too small. I love how it turned out and it is going to look great with this quilt!
 |
| I love that it mimics the arrow found within the quilt! |
 |
| I even had enough extra binding left over from the quilt. |
 |
| Isn't this better than wasting away in a closet somewhere? Turn your scraps into something useful! |
Tip #9 - Don't be afraid to steal ideas from Pinterest.
So I stole a design from Pinterest! Ooops! But...Isn't that what Pinterest is all about? My friend who's daughter this bed set is for mentioned that she would like to have something with a bull head on it. (It's such a popular decor choice right now!) She sent me the image below and asked if i could do something similar.

Isn't this pillow awesome!?! I fell in love right away, and after playing around with switching different fabrics around...I decided it was just too good to do anything different.
I could not figure out how they attached the blue applique and the bull head applique. So instead, I used interfacing to thicken up the fabric and zig-zag stitched them on. The best part about this pillow is the hand stitched detail framing the aqua bull head. So I added that in before attaching the bull head. Here are some pics of the process.


 |
| This pic was taken before the bull head was attached. I finished all the hand stitching on the blue fabric before zigzagging the bull head on. |


 |
| Finish off the pillow as you normally would...attaching right sides together and 1/4 inch stitching all the way around, then flip right side, insert pillow and hand stitch closed. |
Tip #10 - Drink wine and take your time.
'nuff said.
The finished product:


I hope you were able to take away some good tips and tricks to make your next quilting adventure a little bit easier!
Until next time!
-Britt
No comments:
Post a Comment