
Oh my goodness...when I started this blog, I had all good intentions to blog at least once a month. I do so many projects throughout the year that I thought it would be cool to share them. I guess life and a very active one year old can put a damper on my blogging plans. Well, while the projects have not stopped...my blogs obviously have. So I'll do my best to catch you up!
Currently it has been nearly a year since my last post. Say what?!?! Time flies! The last project I shared was the matching twin's nursery blankets for a good friend's twin boys (who was preggo with them at the time). Well the boys are nearly 8 months old now and the blankets look so cute in their new little nursery! Here are some pics...
 |
| Noah and Silas clearly loving their monogram pillows. Or at least Noah likes them. Ha! Silas is not so sure. |
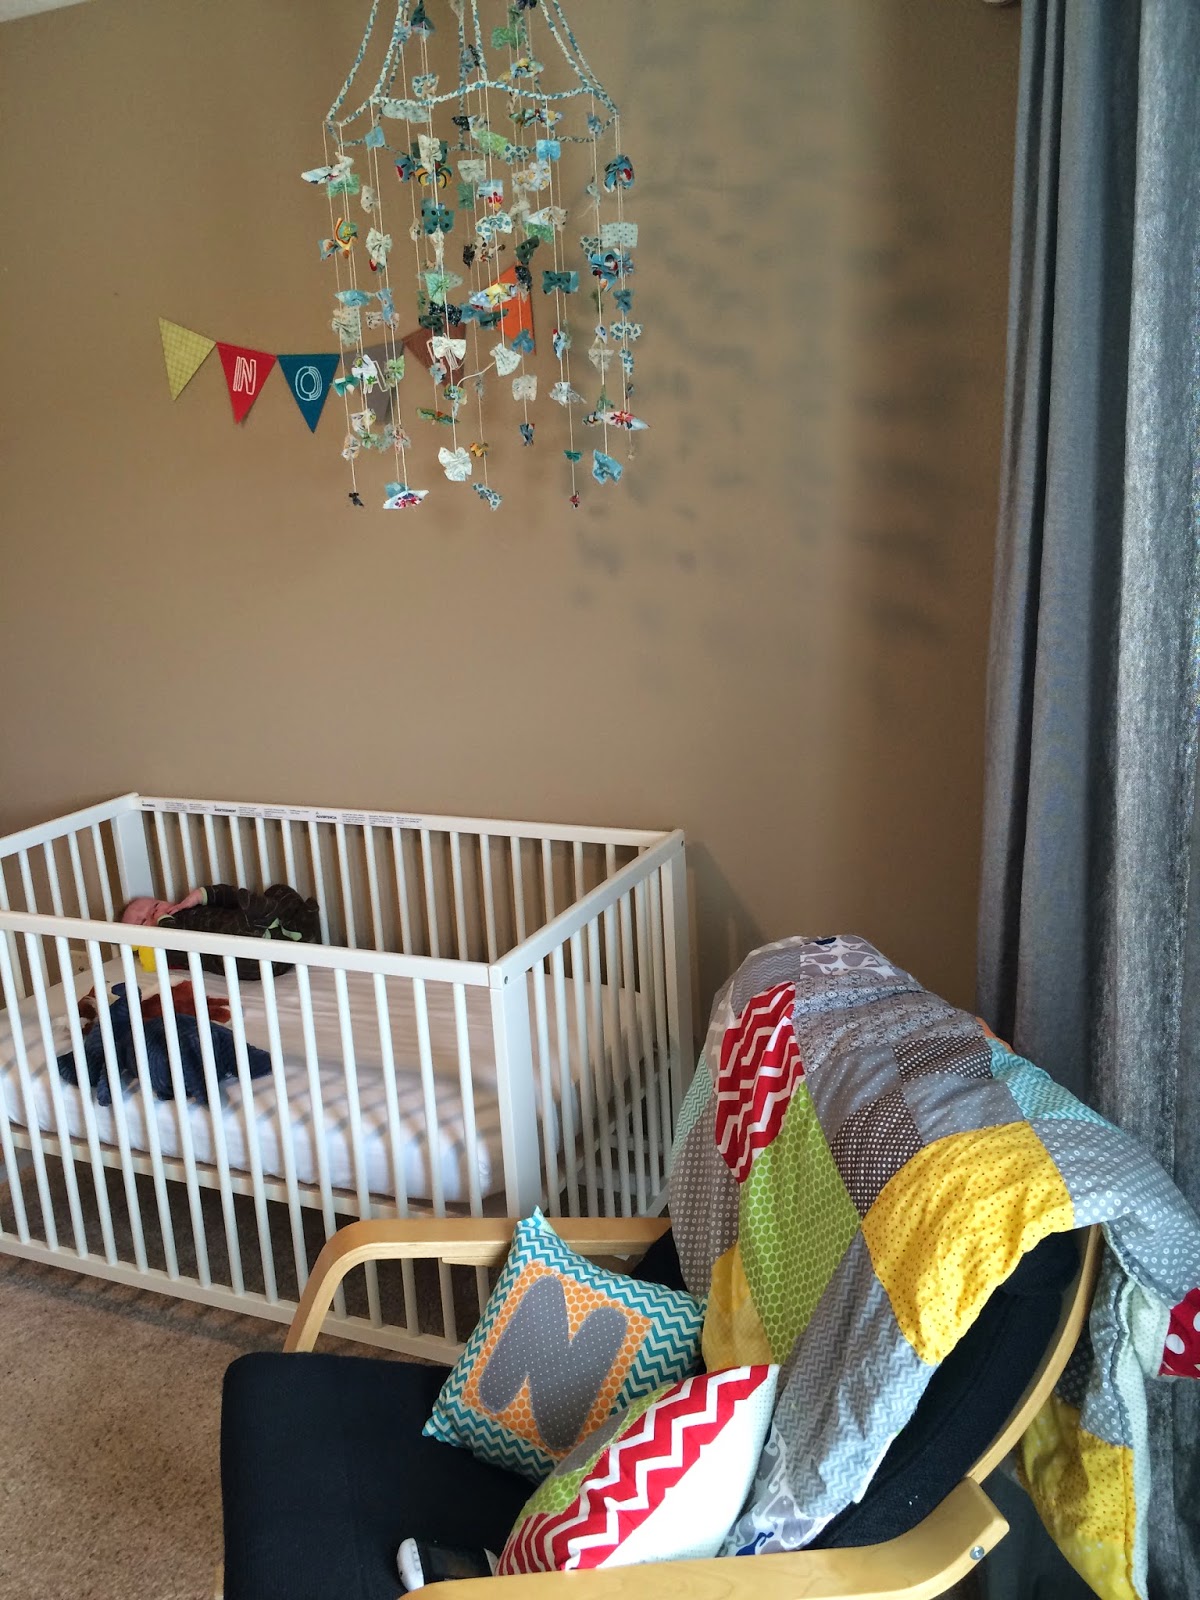
And here is another one of the whole nursery including the blankets! Isn't it so cute? I'm also loving that my friend (their mama) has moved so close! This is their new room in their new house only about 6 minutes away! Hooray! I can't wait for summer time strolls in the park, with the birds chirping and our babies sitting like perfect angels in their BOB strollers as we chat about simple nothings with the sun shining down...uh...what...too much? Oops, sorry.
 |
| Gotta love a twin nursery!! |
One of the things that I think make this room so cute are the hanging fabric mobiles over each crib. One of them was my daughter Lylah's old mobile from her room (transitioned out when I switched up her room decor...another post coming soon!), and the other I made to match! They are made out of old lamp shades and scrap fabric. This is a great project for your scrap fabric stash!
So here goes...a tutorial on how to make a fabric lamp shade nursery mobile!
 |
| Lampshade with tapered sides make the best mobiles. |
Step one - Find an old lampshade, preferably one that has tapered edges so that the strands of fabric hang without touching each other.
Step two - Strip all original fabric from the frame of the lampshade.
Step three - Prepare your fabric pieces. During this step it is helpful to have an overall color theme in mind, and to not get caught up on specific fabric designs. It won't end up making a difference in the end result if your fabric pieces have trains or flowers or geometric designs. The overall color scheme is what you're after. Cut various shapes and sizes of at least 15 different fabrics...i stuck with small squares and triangles ranging from 1-3 inches in length.
Step four - Prepare your fabric strips that will be used to wrap the frame of the lampshade. This process simply consists of cutting long strips about 1-2 inches wide and ironing them in half. You will use the finished ironed seam as you wrap the frame...creating a finished look. The unfinished seam will be hidden as you continue to wrap around itself.
Step five - I forgot to take a pic of this step..but it's pretty self explanatory. Wrap the frame using the long strips and a glue gun. There is no real trick to doing this...your goal is to just keep wrapping and adding dabs of glue periodically. Cover the entire frame.
 |
| Here is the mobile after it has been wrapped. For this mobile I chose greens because the other was done in teals and blues. What better for a boy nursery than green and blue! The prepped fabric strips can also be seen here. |
Step six - Decide on length and placement of your strands...I suggest looking at your specific shade and adding strands where there are frame "intersections", wherever the metal frames are welded together. I also added strands in the middle of these "intersections" to add more dimension. Don't forget to add strands to the inside top portion of the shade too. Cut all of your strands of string leaving an extra 2 inches on each to tie to frame.
Step seven - Using a small yarn needle...begin to string the fabric pieces onto the pre-cut strings. I tied knots about 2-3 inches apart to keep the fabric in place. I also folded the fabric pieces in half and "weaved" the needle in and out of the fabric to create a bunching effect. When attaching the strands to the mobile, I used the needle to "sew" it to the wrapped fabric on the frame.
 |
| Here we are about halfway through. Flipping the shade upside down makes attaching the strands easier. |
 |
| Here they are side by side! I love that they are different but correlate very nicely together. |

 |
| The finished product hanging in their nursery! |
Thanks for reading! And hopefully my next post won't be a year in the making...here's what's coming in the very near future.
- CHALK PAINT! It's freaking awesome...I've pretty much painted every piece of furniture in my whole house. So multiple posts coming on this.
- Lylah's big girl room remodel.
- Backyard decorating.
- Lylah's 2nd birthday...her ladybug birthday extravaganza!
Until next time,
Britt
No comments:
Post a Comment