
We're back with another short-"ish" tutorial on how to use the amazing Annie Sloan Chalk Paint!
Hello again!! I have been meaning to write this post for a long time now. The pictures from my projects have been hanging out in my phone for months now, just waiting to be used. I tried to take as many detailed pictures as I could because, I don't know about you, but when it comes to figuring out something new, I am a very visual learner. So I'll try to keep it short and sweet and just include as many pictures as I can. Here we go!
I recently became obsessed with chalk painting when I decided to change up my daughter's bedroom...I found an amazing vintage dresser at a flee market and it screamed "paint me!". It also started the upward spiral of my chalk painting frenzy. Much to my husband's dismay...I have nearly chalk painted every piece of furniture I possibly can in our house...the struggle is real...if you are reading this and planning a chalk painting adventure...I'm warning you now, nothing in your house is safe after you finish that first glorious piece.
Annie Sloan paint is great because you really don't have to prep your piece of furniture at all. There is no sanding, or priming! The drying time is super fast and you can finish a large piece with two coats in just a couple hours. This paint is fool proof and that is why I recommend it, especially if this is your first furniture remodel. It is a little on the spendy side, but you really do get a lot of bang for your buck. I can finish 2-3 large pieces with just a quart of her chalk paint...a little goes a long way!
Before you start it is important to gather all your materials. Here is what I usually have on hand:
 |
| 1) Annie Sloan Chalk Paint, 2)a natural bristle brush (avoid synthetic bristle brushes because they can lead to unwanted brush strokes), 3)Annie Sloan soft wax (for this project I am just using clear wax) 4) Annie Sloan round wax brush. |
 |
| 5)wood filler to fill in any scratches, 6)putty knife 7)fine sand paper |
 |
| 8)cheese cloth, 9)baby wipes, 10)plastic spoon and container. |
Here was the dresser before painting...I was going for a pink vintage chic look in my daughter's room and the yellow just wasn't fitting. I decided to go with Annie Sloan Scandinavian Pink for a really girly look.
 |
 |
First you need to prep your piece by simply wiping off any dust or dirt with a baby wipe (you could probably use a different type of wipe..but with a 2 year old running around, I have a lot on hand and they work great!). Take all the hardware off and tape the insides of the drawers. (If you are planning to paint your hardware the same color as your piece then you can leave it on)


Normally, there is no sanding necessary, but in my case, this dresser had been painted before and the black paint was peeling...I'm not sure what they used, but it was not the right type of paint. It peeled off almost in one whole strip.


 |
| The dresser drawers are prepped, cleaned and edges sanded. |


 |
| See how streaky it is after the first coat? |


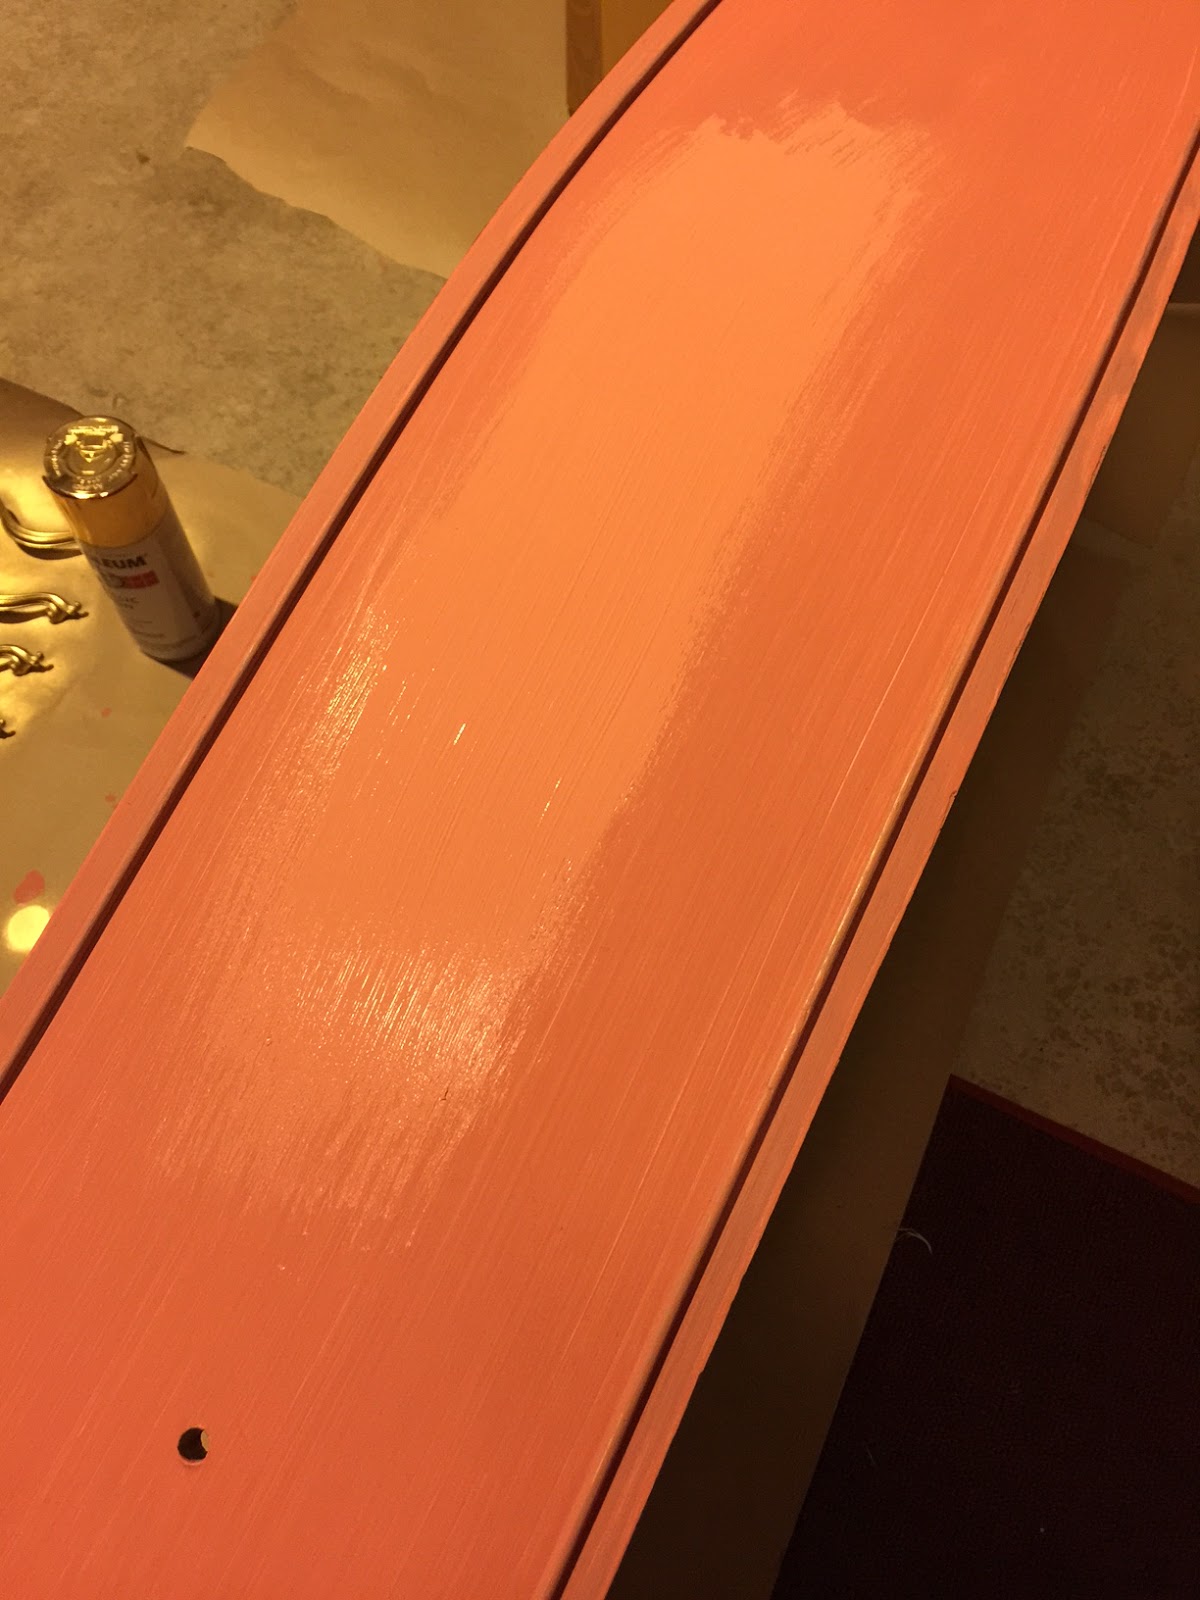 |
| See the difference when you apply the second coat? The color becomes rich and the coverage is perfect. |

For this particular piece, I wanted to add a different color to accent the drawers. I mixed a little of Annie Sloan's Old White with the Scandinavian Pink I was already using to create a lighter pink for the edges. I applied this before the waxing step. I wasn't too worried about being perfect because I was planning on adding a gold paint detail to the piping on the drawer.


After you've let your piece dry overnight, the next step is to wax it...this can be the most intimidating part, but it really is way easier than it seems! If you want to watch an awesome video of the waxing process, check out this Vlog from PrettyDistressed.com
Clear Waxing Step.
The idea is to apply a thin layer of wax and then, using your cheesecloth, wipe off any excess. You are going for thin layers here, you don't want globs of wax in the edges. Use the round wax brush to apply the wax in a circular motion and then wipe off. I run my hand along the piece to feel for any sticky areas. Work in a methodical way from top to bottom, front to back.


I usually like to add two clear coats to my furniture pieces, and for this dresser, because it would be used in my daughter's room, I added 3 coats to the top. You want to let the wax coats dry fully in between applications. This step goes pretty fast and I usually complete it over the course of a few evenings.
To finish this dresser, I added a small gold detail to the piping on the drawers to tie in the gold handles. I also added it to the scrolling detail on the legs of the main piece. Be sure to let your piece sit undisturbed for at least a week to fully cure!


And you are done!! Here is the finished piece!


I also picked up a coordinating smaller dresser from Craigslist and a small nightstand from the Goodwill to finish off my daughter's bedroom furniture. Here are a few picks of those and their transformations!
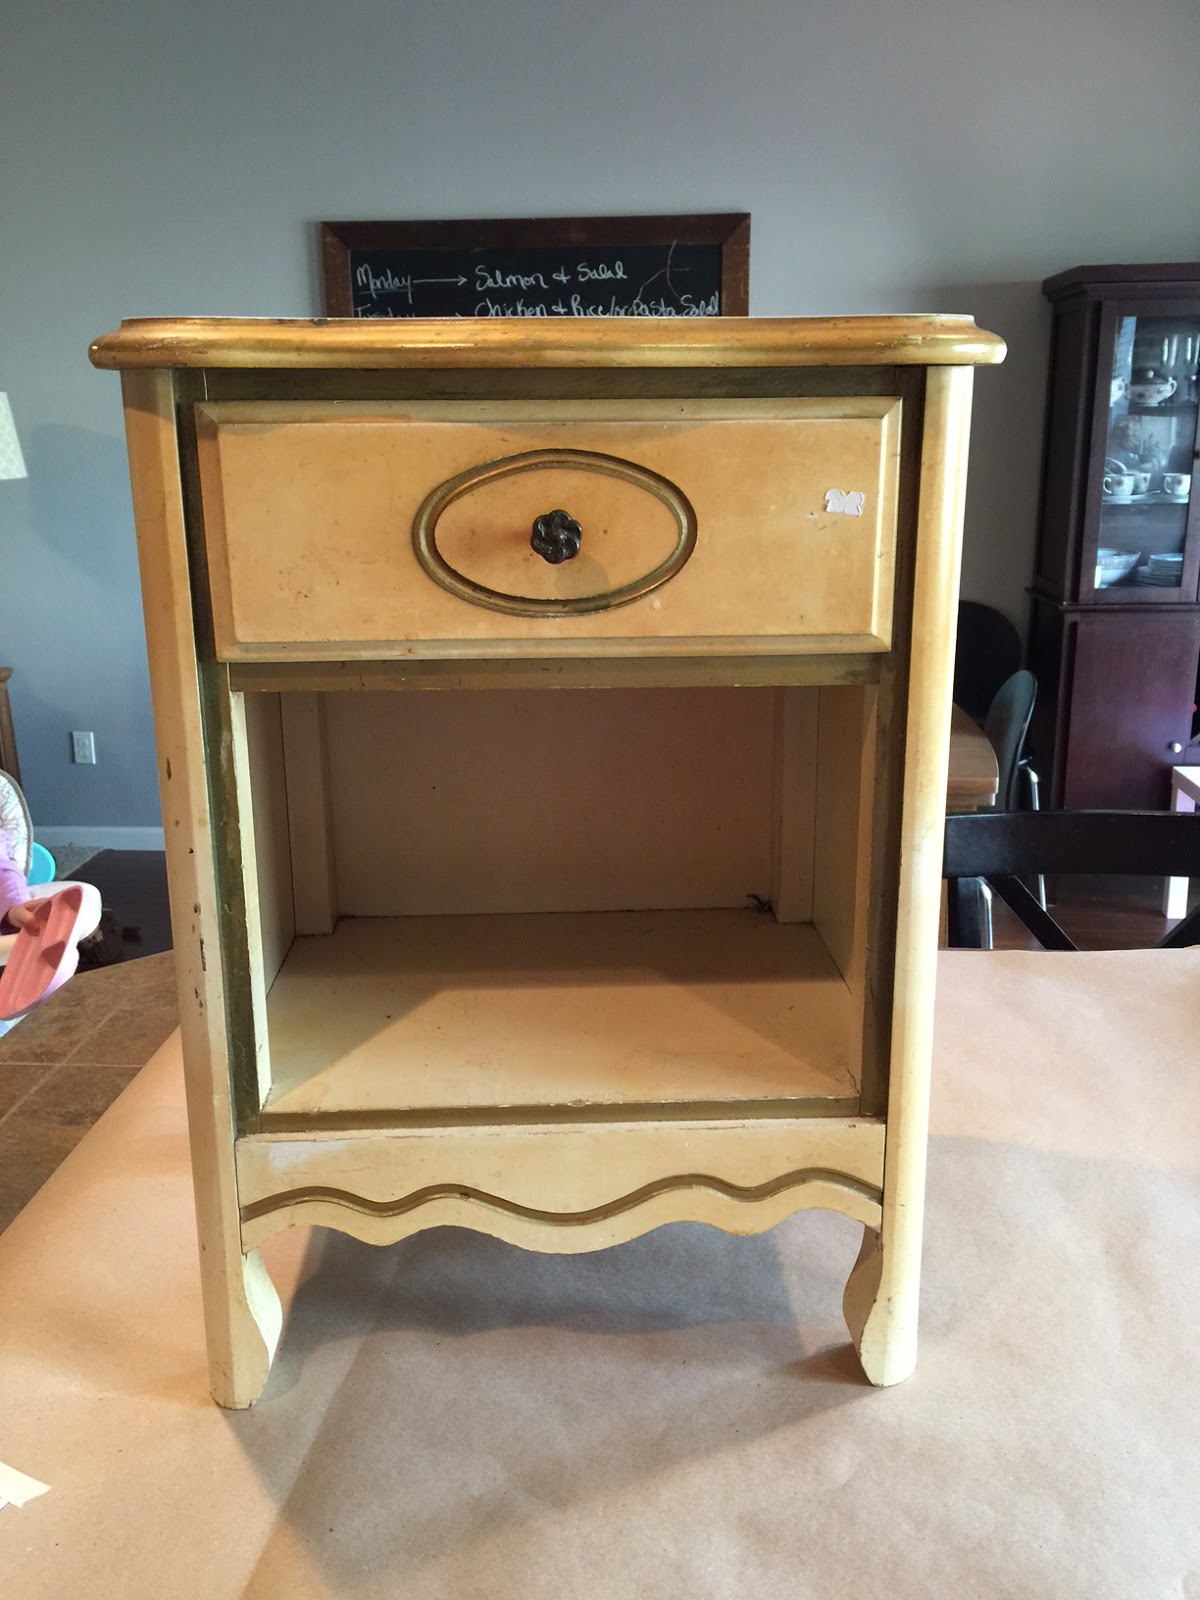


Here is the other small dresser:


I loved how these turned out! And they look so cute in my daughter's room. I love how they all look like they were meant to go together as a bedroom set! Let me know if you have any questions and I'll be sure to answer!
Stay tuned for a tutorial on how to use dark wax and distressing to add depth to your furniture makeovers!
Until next time,
~Britt