Hi again everyone! I am excited to share my first sewing tutorial...it shall be called, "Sewing for Noah and Silas".

Over the past few years, many of my good friends have started their journeys into parenthood. What a wonderful adventure to embark on! And how exciting that Lylah will have so many little friends to play with! One of the things that I make sure to do for each expecting mama is sew a custom baby blanket for her nursery. (So if you are reading this, and you have a baby with a blanket from me...know you are special.) I always try and make the blanket match the theme that the parents-to-be already have in their nursery. After all, if I'm going to sew something special, it might as well be used right? I mean, we've all been that awkward 12 year old on Christmas morning, excitedly opening a gift from ol' grandma; only to find it's a hideous piece of hand-sewn clothing that will only further add to your awkwardness. And what's worse? You'll probably have to wear it to the family dinner that night just so she can see you in it at least once...wait...what? Just me? Oh...anyways...I guess that's why I try and always sew stuff that people will actually like.
It was no different when one of my best friends announced that she was pregnant with twin boys! How exciting!! The mama-to-be was doing her nursery in grey tones with pops of bright colors here and there. I didn't want to make the same exact blanket for each boy...but I did want them to be similar enough to go together in the same nursery. Two blankets takes longer to make then one, so I knew I had to get started right away.
I am a planner...so after deciding on fabric, I came up with this. It was an easy way to "see" what the quilt top would look like without having to cut out fabric in a "trial and error" method.
 |
| How I planned out the arrangement with how many squares to cut. Colored pencils helped me to visualize the finished product. It's messy, but it worked great! (The side table was my guide for how many squares to cut of each size and color) |
I mentioned before that I wanted to make the twins' blankets slightly different. This was accomplished by following the same color/pattern design, but with slightly different fabrics. I decided that all of the grey squares between the two blankets would match up; but for the color fabrics, I would choose different patterns. Initially, I wanted to add a fabric to each that would incorporate each color, but after cutting and laying them all out, it was too busy and I went with the whale pattern in each. Here was my inspiration.
 |
| The greys would be the same in each blanket, but for each color - I chose a slightly different patterned fabric. |
The first step is to cut all of your fabric squares. Refer to your guide for this. My finished blanket would be a compilation of 9" squares in a 5X7 grid pattern. Some of the 9" squares are made up of 4 smaller squares. For each "big" solid square, cut 9 1/2" squares (1/4 inch seam allowance). For each "small" square, cut 5" squares (1/4 inch seam allowance doubled).
 |
| Careful measurements help with seams matching up later. |
After you have cut out all of your squares...it's time to start sewing! Start with the smaller squares first...piecing them to match up with your larger squares.
 |
| Start with your 5" squares. Sew along edge with a 1/4 inch seam allowance. |
 |
| Iron down your seams and then match up middle seam. |
 |
| Pin with seams matching up and them sew with 1/4 inch seam allowance. |
 |
Your finished product should be a 9" X 9" square. Iron all seams flat.
|
Now it's time to organize your squares...I made a pile of all my squares in order according to my guide. That way, all I had to do was pull the next square from the pile.
First you will sew the bottom row of squares together. It is really important to keep your seams at a 1/4 inch allowance the entire time. I found a little trick that helps me to do this...
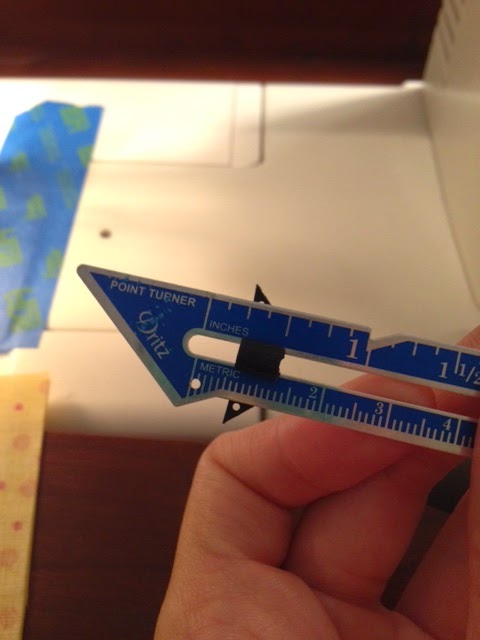 |
| Set your measure to 1/4 inch. |
 |
| Measure from the point of your needle out towards the right. Add a piece of blue painters tape to help you guide as you sew. |
 |
| 1/4 inch allowance every time! |
Now keep going until your entire bottom row is sewn together and you have something that looks like this...
Sew your second row as well...you can see in the picture above, I am just piecing my last square of my second row. I work from the right to the left. Once you have two completed rows, you will iron down the seams, and then sew them both together with one long stitch.
 |
| One trick that I use to make sure my 4 seams end up squared is to measure as I go judging off of the row beneath the current one...I mark where the seam needs to be and I always end up with squared edges! |
 |
| Here I have two of the bottom rows sewn together. |
Keep working until, row by row, you have completed the entire quilt top. See Below!
The next step will be to cut your backing and lining. I used a flannel for the back of this blanket, and I used a medium thickness basic quilt batting for the lining. Make sure to cut both the backing and lining about an inch larger that your finished quilt top.
Once your pieces are cut, you will layer the three pieces in the following order. Batting on the bottom, flannel right side up, and quilt top wrong side up. See below...
The next step requires some patience...you will start pinning from the middle square out (use quilting safety pins). Smooth as you go. Be very careful you have no bubbles, this will result in an uneven stitch and unsightly puckers!
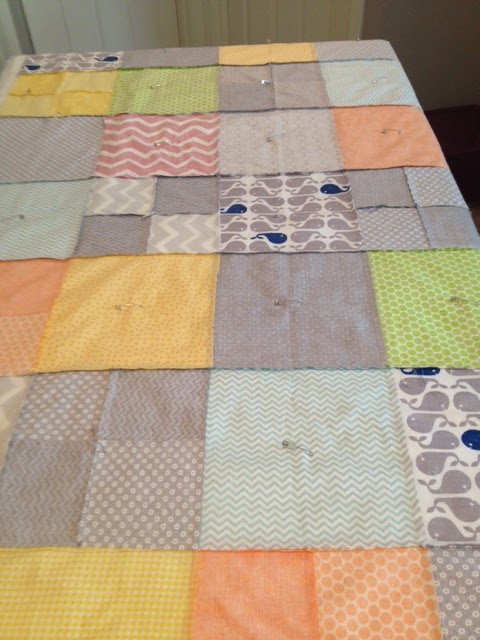 |
| I put a pin in each square as well as pinning generously around the perimeter. The more pins, the easier the next step! |
The next step is to roll up your blanket like a burrito and strait stitch around the entire perimeter of the blanket with a 1/4 inch seam allowance. Your guide is the quilt top fabric. Make sure to leave about a 12" open space for you to turn right side out. See pics below...
 |
| Rolled up like a burrito and ready for the strait stitch around the perimeter...at each corner, you'll need to unroll and re-roll in the new direction. (This just makes it easier to manage all that material!) |
 |
| Once your strait stitch is done, trim excess batting and lining to match up with the quilt top. |
 |
| Remember to leave the excess on your opening. This will make the closing of the whole a lot easier! |
The next step is my favorite!! You will now take out all the pins (not my favorite) and turn the blanket right side out...this is the best feeling after all the tedious sewing! You can finally "see" the makings of a finished product!
You now only have a few short steps left! Once the blanket is turned, pin the opening shut and add one more strait stitch around the perimeter of the blanket; sewing the opening shut as you go. Now all you have to do is add yarn ties and you are done!
 |
| Boom! |
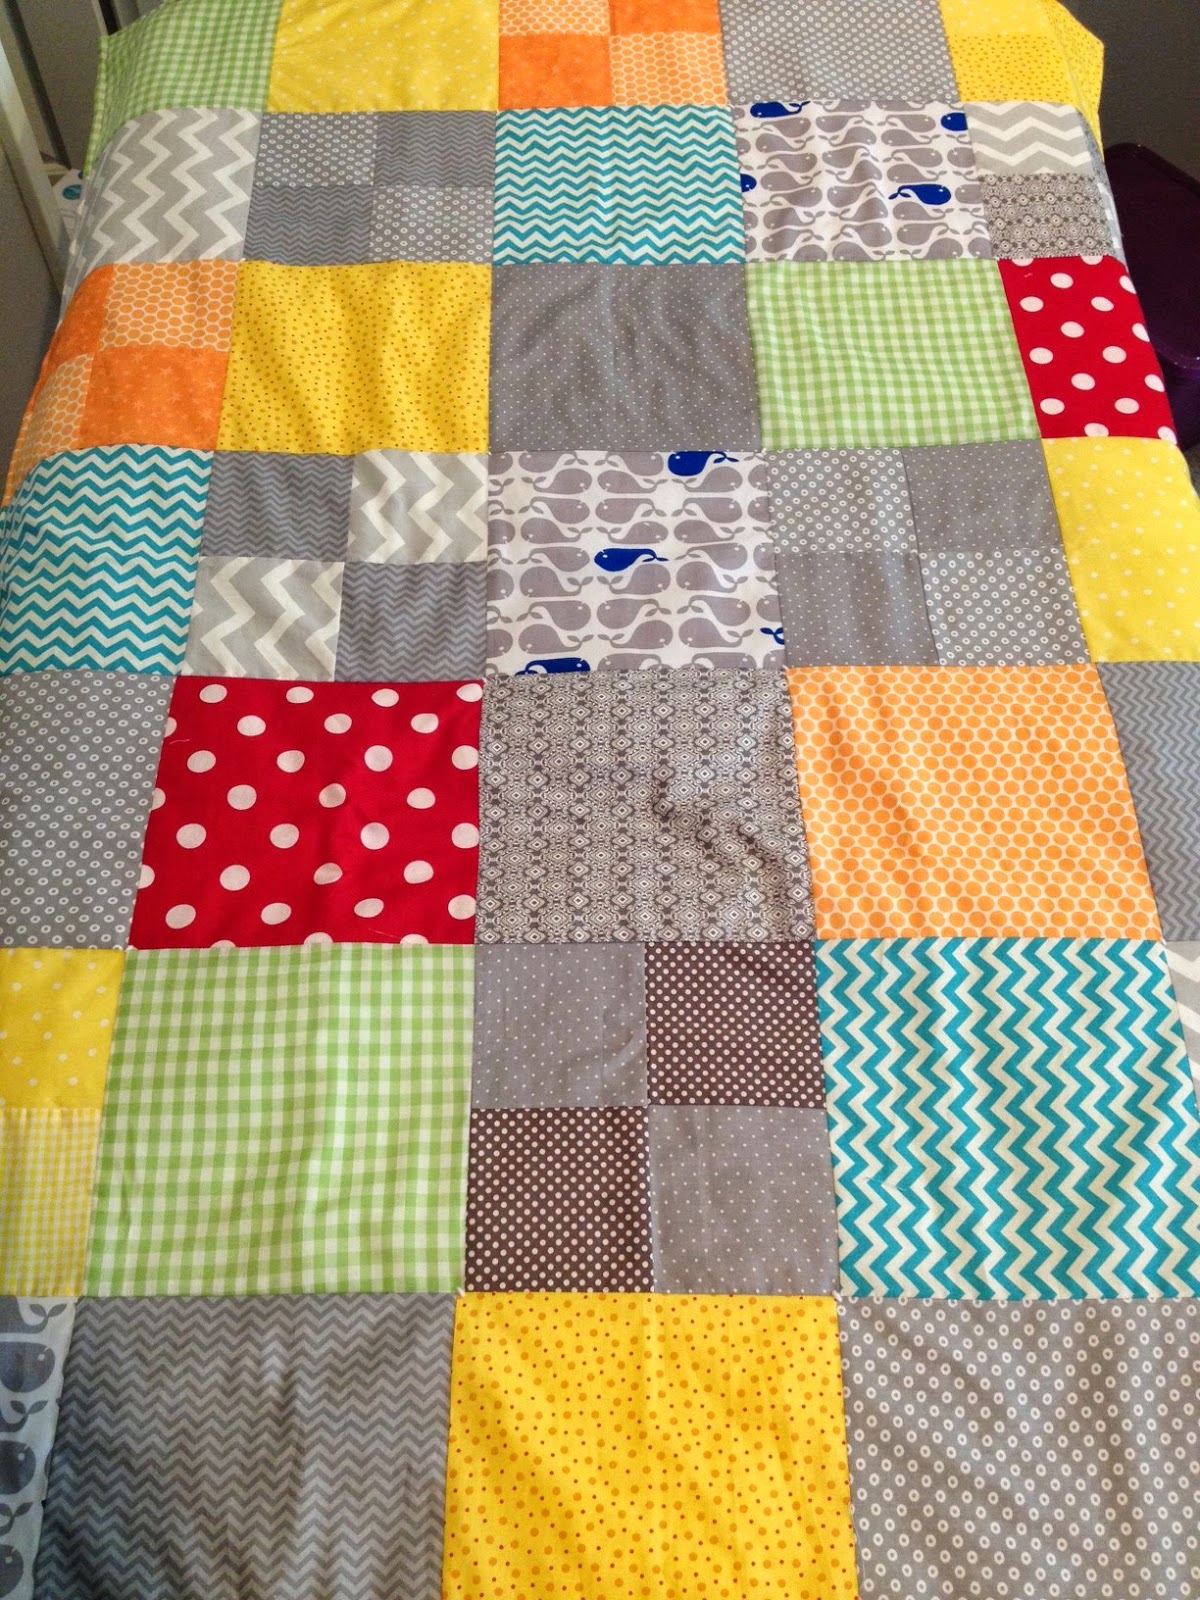
Here are some more pics of the finished product!
Noah and Silas will be warm and cozy for years to come! Not to mention how cute their little nursery is going to be. Congrats to the mommy and daddy to be! Hopefully these blankets are loved and cherished forever. XOXO!!
Britt